
First-Time Resident Setup
Summary
Step-by-Step Instructions
1Step 1: Open your Grata welcome email, invitation, or setup link
- Use the welcome email or invite your property sent to the email or phone number on your resident record.
- The message may include your login email, a temporary password, a download link, or a QR code for the app.
- See Receiving Your Welcome Email if you need help finding the message.
2Step 2: Download or open the Grata app
- Install the Grata app from the App Store or Google Play, or open it if it is already installed.
- You can also use the download link or QR code in your welcome email when provided.
- See Download and Install the Grata App for install help.
3Step 3: Sign in or create your account
- Open the Grata app and sign in with the email or phone number connected to your resident record.
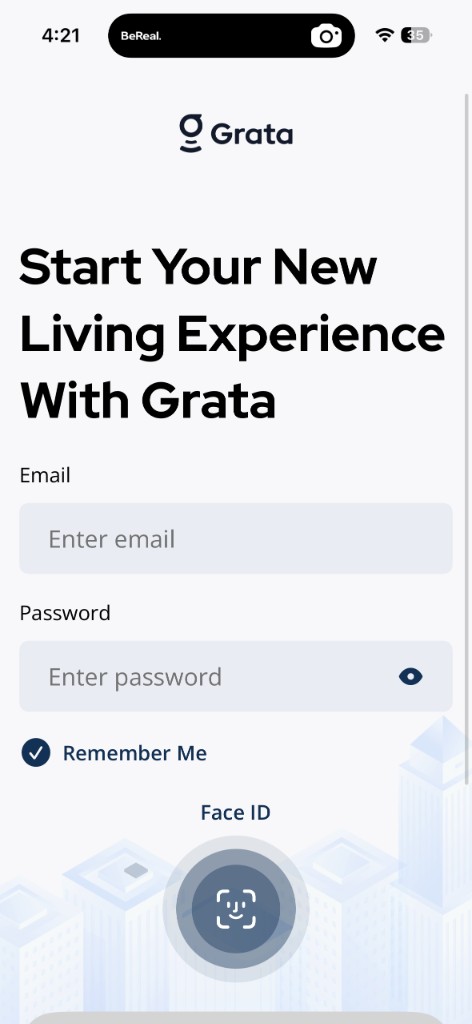
Sign in with the email or phone number connected to your building.
- Enter the temporary password from your welcome email when prompted.
- After first sign-in, the app may ask you to create a permanent password on the Set Up A New Password screen.
- Enter your new password in New Password, confirm it in Confirm Password, then tap Update Password.
- Your password should be at least six characters. Strong passwords use letters, numbers, and symbols.
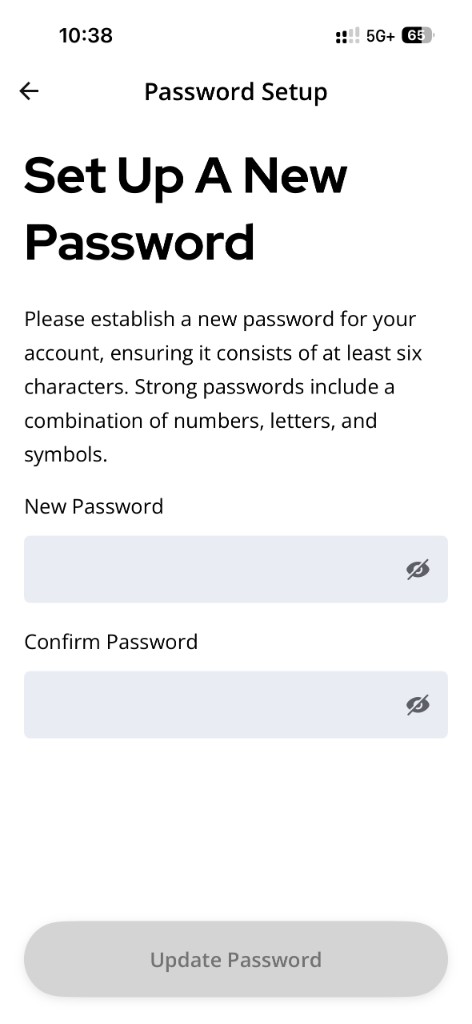
Create your permanent password when the app prompts you after first sign-in.
- See Sign In to the Grata App for additional sign-in help.
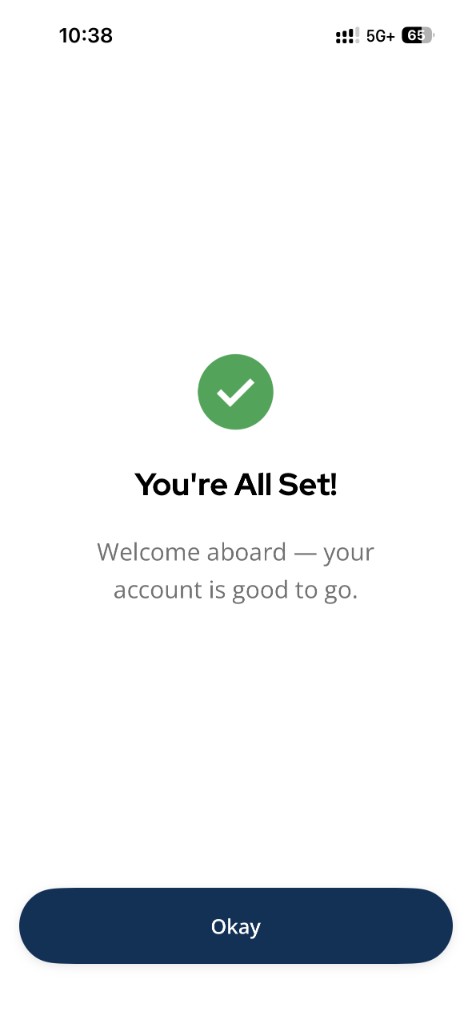
Confirmation screen shown after password setup is complete.
4Step 4: Confirm your building and unit information
- After setup, check that your building, unit, and resident details look correct in the app.
- Do not use access features if the building or unit information looks wrong.
- See Report Incorrect Account Information if details need to be corrected.
5Step 5: Enable required phone permissions when prompted
- Allow notifications when the app asks so you do not miss building updates or access alerts.
- Enable Bluetooth or Nearby devices when prompted if your building uses app-based door access.
- Some phones may also ask for location or nearby device permissions for Bluetooth-based access.
6Step 6: Review the features available in your building
- Swipe through any Welcome to Grata introduction screens, then tap Get Started, Continue, or Skip.
- Your home screen may show Digital Key, PIN access, Manage Access, deliveries, amenities, work requests, notices, smart locks, thermostats, leak detection, or other connected services depending on what your building enabled.
- Not every building shows every feature.
7Step 7: Test access features only when it is safe and appropriate
- Try app-based access only when you are at the intended door or access point.
- Use related Help Centre articles for Digital Key, PIN, guest access, or other tools your building enabled.
If your invite or setup link does not work▾
- Confirm you are using the email or phone number your property has on file.
- Check spam, junk, promotions, or filtered inboxes for your welcome email.
- Try opening the setup link again from your phone.
- Confirm the invite has not expired if the app indicates that.
- Property management may need to resend the invite or confirm your resident record.
- See I Did Not Receive My Welcome Email for additional troubleshooting.
If your building or unit looks wrong▾
- Confirm you are signed into the correct account.
- Confirm whether you selected the correct building or unit if multiple options appear.
- Do not use access features if the building or unit information looks incorrect.
- Property management controls resident records, unit assignments, and access permissions.
- The property team may need to update your information before Grata displays the correct setup.
- See Report Incorrect Account Information and Who Controls My Access? for next steps.
What you may see after setup▾
- Your home screen may show different tools depending on what your building has enabled.
- You may see access tools, guest access, deliveries, amenities, work requests, notices, smart locks, thermostats, leak detection, or other connected services.
- Not every building has every feature.
- Some features may roll out in stages after move-in or after your property finishes configuration.
- See Grata App Overview or What is Grata and What Does It Do in My Building? for a broader overview.
Related articles
Grata App Overview
1 min read
Orientation to the Grata Smart Living app—access, bookings, requests, notices, devices, and what your building...
Download and Install the Grata App
1 min read
Install the white Grata Smart Living app from the App Store or Google Play, then continue to the [Sign In to t...
Sign In to the Grata App
1 min read
Sign in to Grata Smart Living with the email on your building profile and your password or temporary password.
Report Incorrect Account Information
1 min read
If building, unit, or resident details are wrong and cannot be edited, report them to your building team.
Who Controls My Access?
3 min read
Property management controls your access permissions — Grata reflects the building setup; contact your buildin...
Receiving Your Welcome Email
1 min read
Your building sends a welcome email when your account is ready — find your login email and temporary password,...
What is Grata and What Does It Do in My Building?
3 min read
Learn what Grata Smart Living is and how it supports resident app features, access, communication, and connect...
What changes after Grata is installed?
2 min read
Learn what residents may notice when Grata features are introduced or updated at their building.