
Add a New Guest in the Grata App
Summary
Step-by-Step Instructions
1Step 1: Open Manage Access
- From the Grata Smart Living home screen, tap Manage Access, then tap Add New Guest.
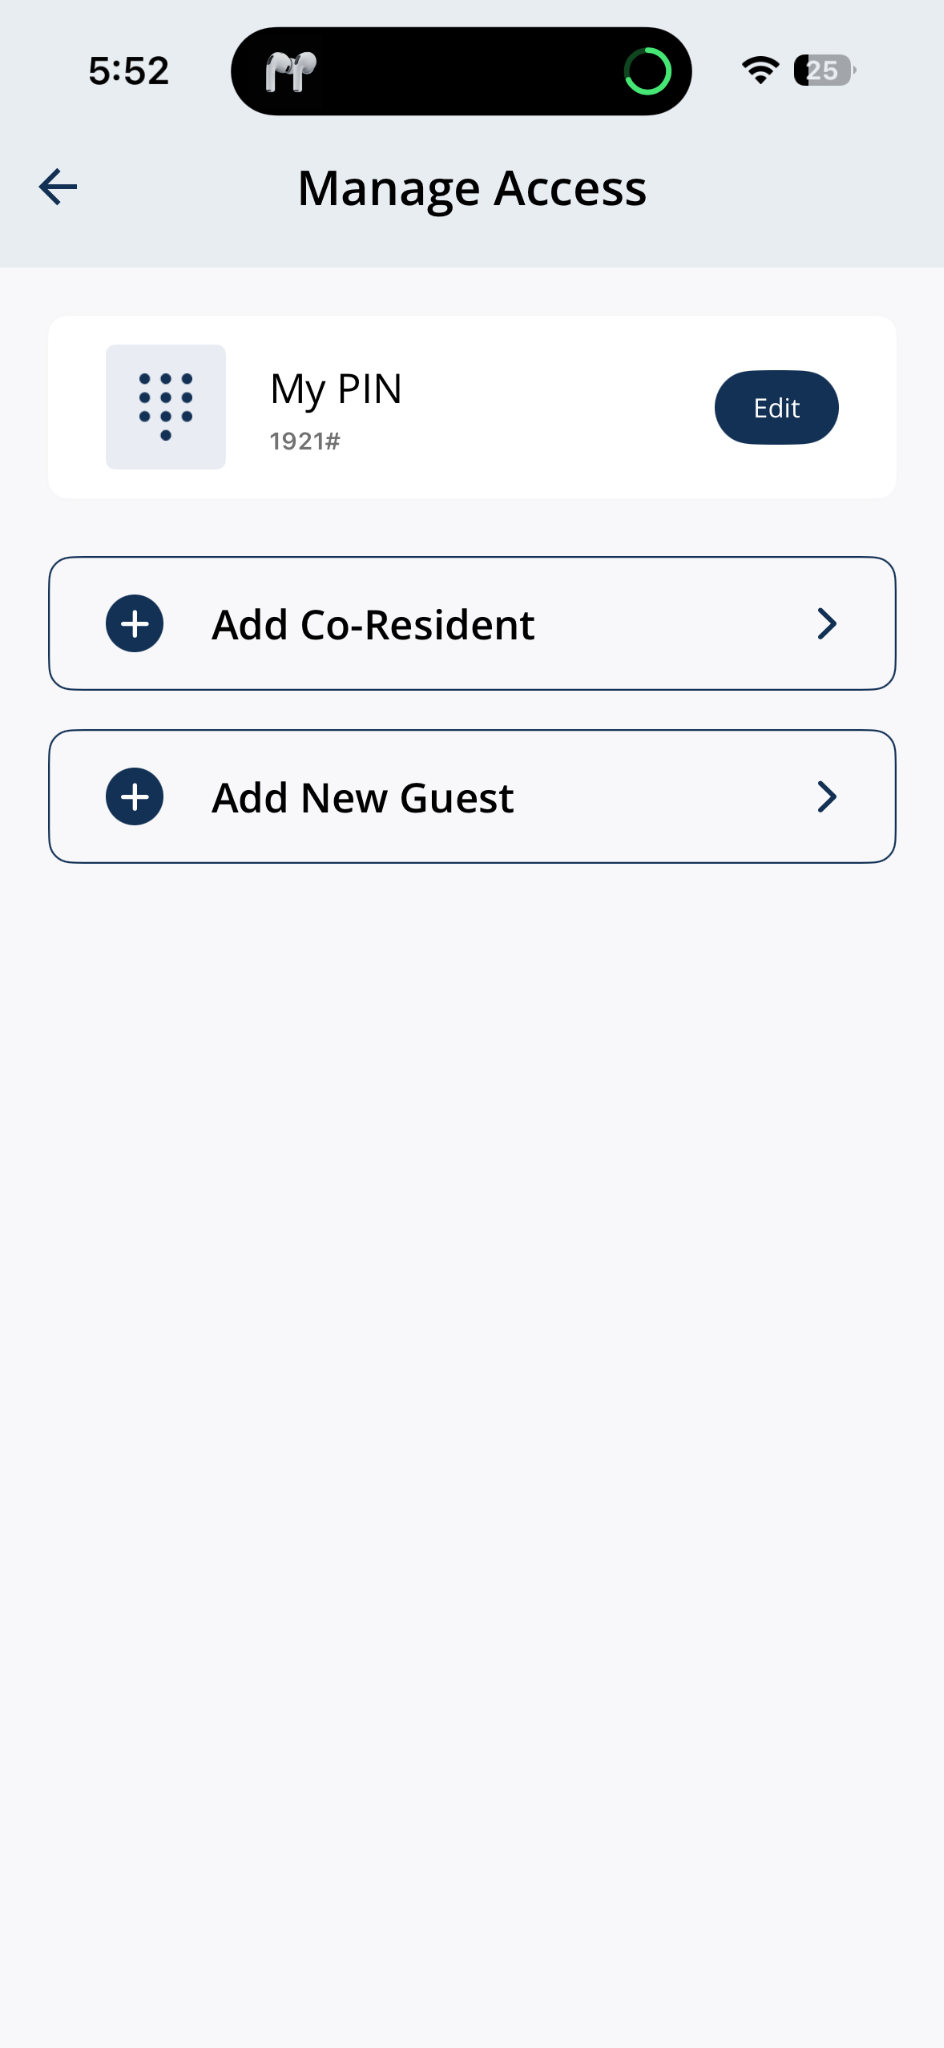
Open Manage Access and tap Add New Guest.
2Step 2: Choose Guest App
- Select Guest App, then tap Okay.
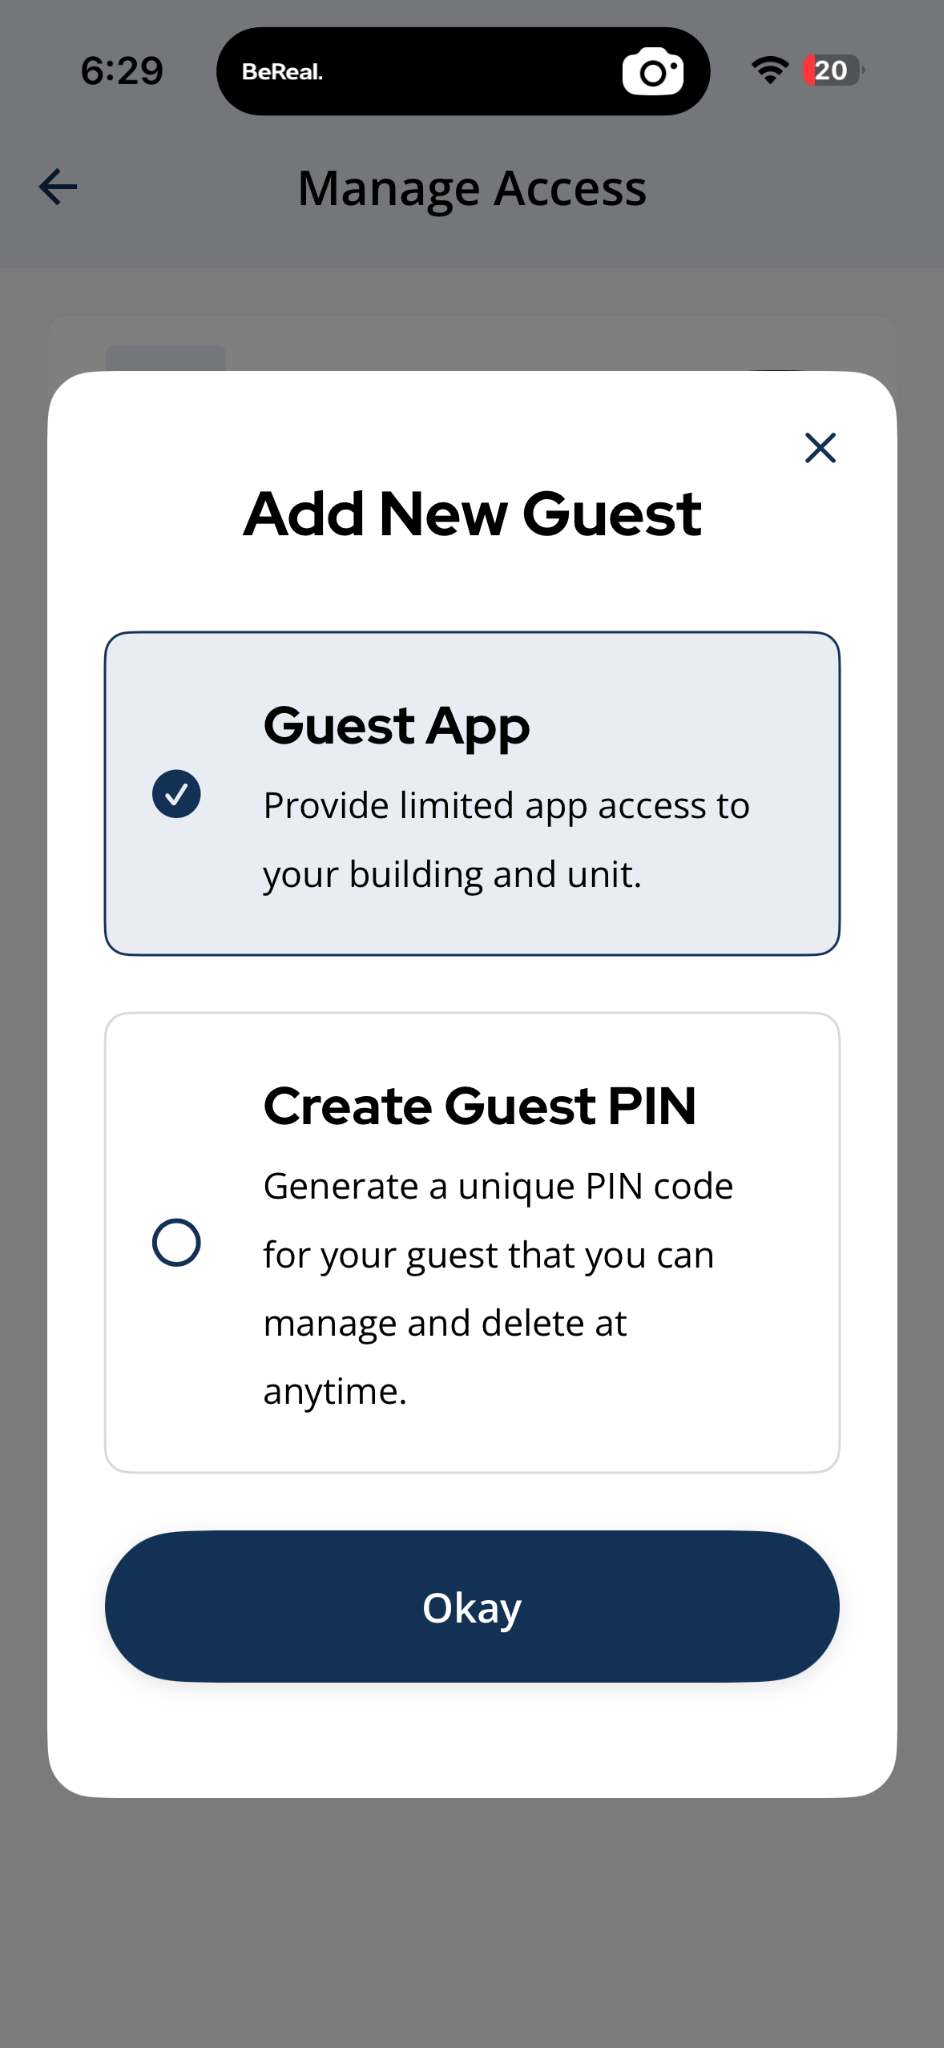
Choose Guest App, then tap Okay.
3Step 3: Enter the guest's details
- Enter the guest's name and contact information when prompted.
- Fields and required details may vary depending on your building.
4Step 4: Set access options if available
- If your building allows it, choose which doors the guest can access, set a start and end date, or select a time window.
- Exact options depend on your building's setup.
5Step 5: Send the invitation
- Confirm and send the invitation. The guest receives an email or notification with instructions to download the app and accept access.
- The guest appears in Manage Access once they accept the invitation.
- To remove a guest later, see Remove Guest Access.
6Step 6: Open Manage Access
- From the Grata Smart Living home screen, tap Manage Access, then tap Add New Guest.
Open Manage Access and tap Add New Guest.
7Step 7: Choose Create Guest PIN
- Select Create Guest PIN, then tap Okay.
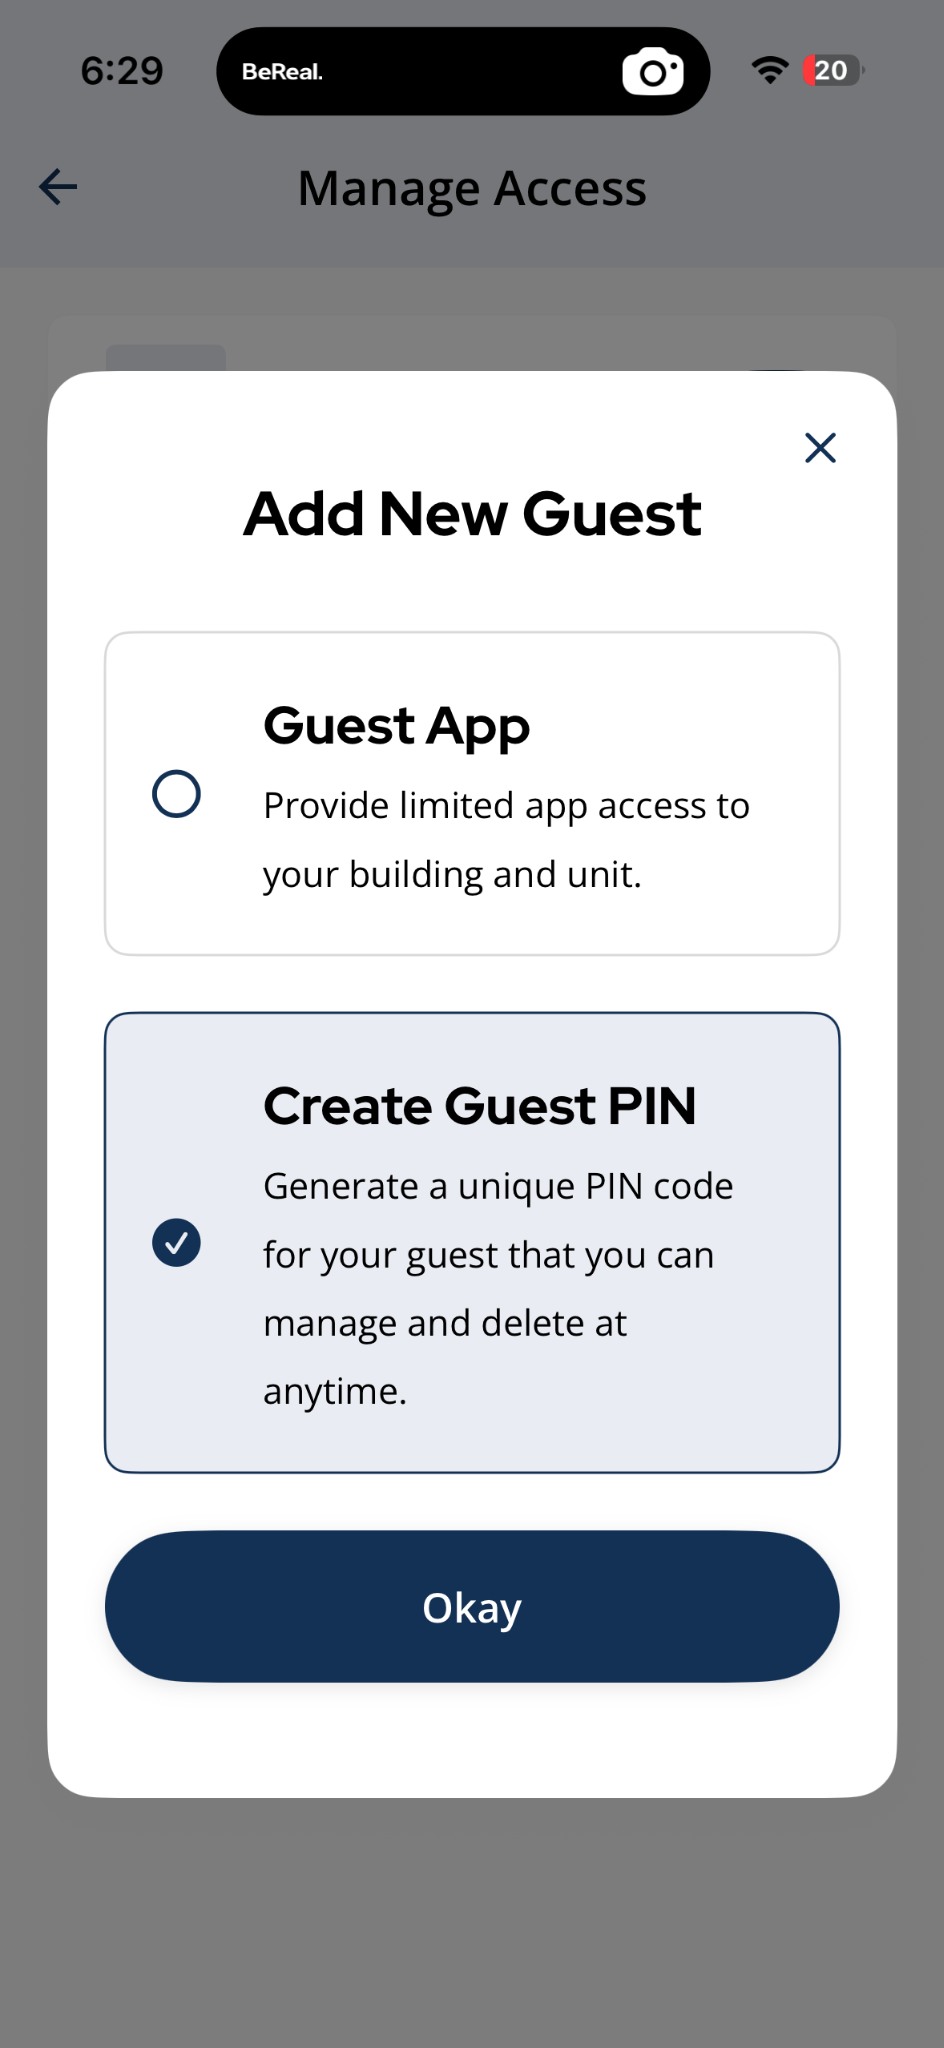
Choose Create Guest PIN, then tap Okay.
8Step 8: Enter the guest details and PIN
- Enter a name and PIN code for the guest, following any PIN rules shown by the app.
- Guest PINs are separate from your personal resident PIN — do not your own PIN.
- Guest PINs may not be available at every building.
9Step 9: Set access dates or limits if available
- If your building supports it, set access dates, times, or allowed doors.
10Step 10: Save or confirm the guest PIN
- Tap Confirm or Okay to save. Stand near the lock if the app prompts you to.
- For a detailed walkthrough, see Create a Guest PIN.
Related articles
Create a Guest PIN
1 min read
Create a named guest PIN from Manage Access > Add New Guest > Create Guest PIN.
Guest PIN vs Guest App
1 min read
Choose the right way to invite a guest — a PIN code is fastest, the Grata Guest app is more secure for longer...
Remove Guest Access
1 min read
End a guest's access early — works the moment you tap, no notice required.
Add a Co-Resident in the Grata App
1 min read
Add a co-resident from Manage Access > Add Co-Resident with their contact details.
Manage Access Overview
1 min read
Manage Access is home for My PIN, Intercom PIN, co-residents, and guest invites—open the linked article for ea...
Set Up a Guest with a Grata Account
1 min read
Send a Guest App invite from Manage Access with the guest's name, email, and phone number.